

Publish Genealogy Web Pages in Legacy is a powerful feature that helps genealogists easily share their family history online. The Personal Web Page Creation system of Legacy is comprehensive when compared to any other family history software program, allowing the creation of Web pages in five different styles: Ancestor Books, Descendant Books, Pedigree Charts, Family Groups, and Individual Pages. Of special note is the Pedigree style of Web Page, which features a vertically-arranged genealogy tree that can be easily navigated with a mouse.
Each of these page styles features a Table of Contents and Name Index, along with individually customizable content pages. In addition to using the program as a basis for creating family history pages, the user will have the ability to add custom HTML to the family’s pages. These HTML additions can allow advanced users to include buttons and other features in their family’s pages.
Legacy allows users to link their pages to other websites and to allow for the download of GEDCOM files. The user’s first step in getting his or her family history onto the Internet will be to generate family history Web pages. Once the family history Web pages generated by the Legacy software have been created, the user can then upload their family history pages to his or her Web site.
In this guide, you will learn all about how to publish Genealogy Web Pages in legacy effectively. Along with that, we have demonstrated how to complete the first two steps of getting your family history onto the Internet using the Kennedy Database (Sample.FDB) and uploading the pages to the user’s website using a program called WS_FTP Pro. Kindly follow along carefully as instructed for better results and you will publish genealogy web pages in legacy with no time.
- Generating Web Pages
- Forcing Lowercase File Names
- Customizing Legacy to automatically view Web Pages
- Uploading your Genealogy web pages to the Internet
- File Transferring Protocol Utilities
How To Create And Publish Genealogy Web Pages In Legacy Family Tree
Generating Web Pages
1. Website creation tool – Click the internet option and choose one of the 5 types of WebPages (Ancestor, Descendant, Pedigree, Family or Individual).

2. The right side of the screen has buttons to Create Web Pages (press when ready to create your web), Close, Help, and Privacy Options. If you choose Privacy Options, you will not have any of your or any other living person’s private information included on your WebPages. There are also load and save options to save your choices and use them at a later time. If you experience formatting problems, such as line or text overprinting, pressing Reset will return all of your choices to their default values.
3. Select a project to set a project name which is the name of the folder to save your WebPages. The home webpage can have a custom title. The remaining pages can have customized titles as well. If you have a street address or an e-mail address, provide it on this tab. On this tab, you can also create a custom introduction.

4. Then select the Who tab. By default, the current (highlighted) individual in Family or Pedigree View is automatically selected as your starting person. The starting person you will select will depend on which type of webpage style you decide to use. When creating an Ancestor or Descendant style webpage, you can change which person is the starting person by clicking the Change Button and making your selection from the Name List. You can also determine how many generations to include. For Pedigree, Family Group, or Individual type WebPages, to include everyone in your family file, select the first radio button; to include only specific individuals or families, select the radio button for “Selected Records in the Focus Group,” and by clicking the View/Select Focus Group button, make your selection.

5. Click on what you want to add to your webpage. If an item is greyed out, it cannot be used with the web page style you chose. The types of things that can be greyed out will change based on which web page style you use.

6. Click on the other tab. If you’d like to add a GEDCOM, click the select button and find the GEDCOM file on your hard drive. Use the Check Pictures/Sound option to choose these options too.

7. Click the graphics tab. This is where you select what type of buttons, backgrounds, arrows, and line separators you want for your webpage.

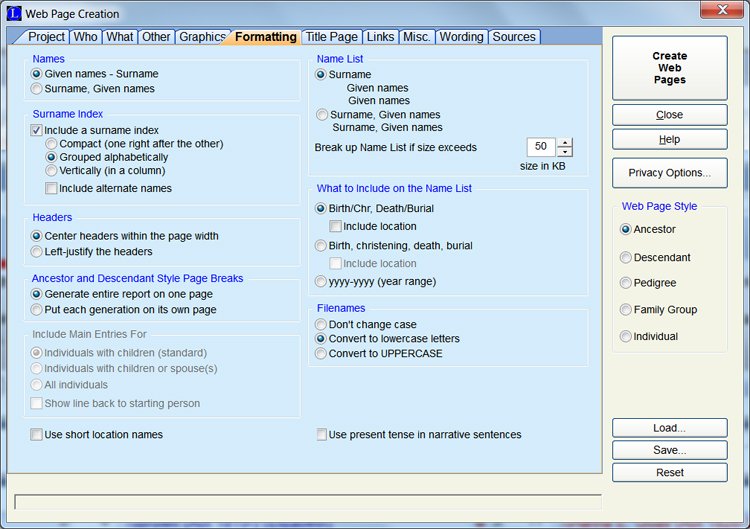
8. Click the Formatting tab and select how you want your names and headings to appear on the pages of your website, as well as in the Index file. File Name Case: You should always choose to “Convert to lower case” when naming the pages and images of your site so that when you upload them with your FTP utility to create your site, all of the links will operate correctly and will not result in broken links because some web servers are case sensitive and any change in case will generate a broken link. (See Forcing Lower Case Filenames.)
9. Click the title page tab and select an image.

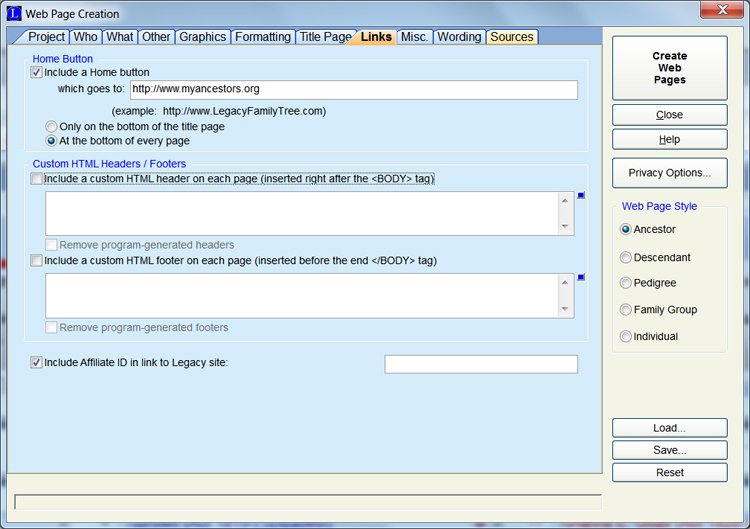
10. Click the Links tab and insert the URL for your home page. The Links tab allows you to customize the links to the top and bottom of all your web pages; this is only applicable for advanced users.
11. After entering the Misc. tab, you should include the information on your Website to be able to be indexed by any given Internet search engines (like AltaVista or Yahoo). If you want others to be able to find your Web pages, then this is a must. In the keywords section, it might be a good idea to put down as many surnames that you research (e.g., Brown, Huffman, etc.).

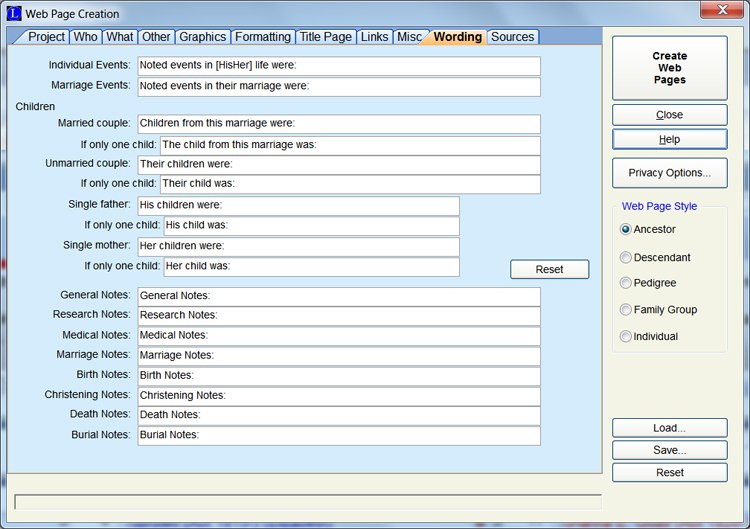
12. In the Wording tab, you can also enter phrases that you wish to have in the narrative paragraphs of your report.
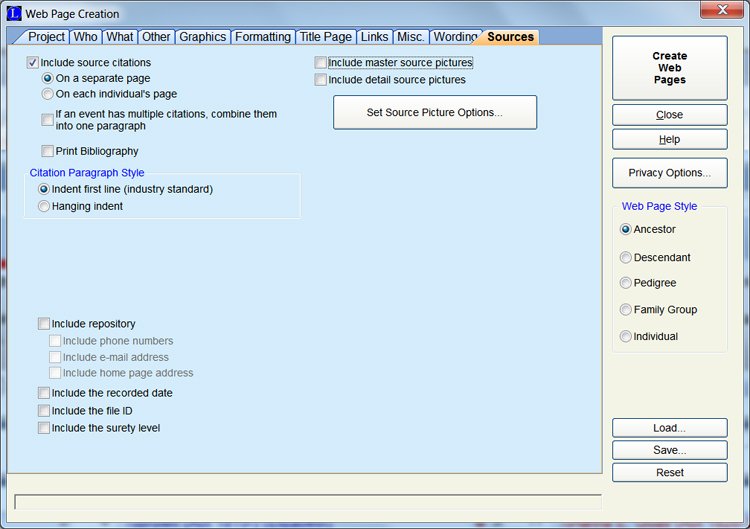
13. In the Sources tab, you may enter where you got the information for your individuals. You can also add a source picture.
14. Once you have checked off the ‘who, what, style, formatting, graphics,’ and so forth and have saved the options by clicking on the Save button, you can reload them if you decide to update your Web Page later.
15. To add ycustomizedages, click the Create Web Pages button. If you have customize Legacy to work with your Internet Browser, as soon as the Web pages are created, you can see how they look. They now exist only on your computer and will not be public until you upload them to the Internet.
Upload Your Genealogy Web Pages To The Internet.
- Prior to adding your web pages to the Internet, you will need to contact your web host or ISP to verify that you have server space to put your web pages on and for them to assign you a directory to use for your web pages.
- There are many utilities available for transferring files on the Internet; if your selected web host does not provide a web-based interface to upload files, you may benefit from one of these. One of the more effective utilities is WS_FTP Pro, which can be found at wsftp.com. (see utilities for file transfer protocols)
- Open the WS_FTP software. You should see a screen similar to the following example:
- Click the New button, then from the ‘New’ site/folder dialog box, select FTP site and enter your Internet address for the site that you wish to configure. Type in the host name of the FTP site and click ‘Next.’
- The Host Name dialog box will prompt for the host name. If you’re not sure of what to put in the box, check with your ISP for guidance.
- Type in your User ID & password when prompted in the ‘Log on Information’ dialog box. Once completed, click on the Finish button.
- The view will take you back to the first WS_FTP screen. You will see your created connection listed and highlighted in the list of available connections. Click on the OK button to connect to your FTP connection.
- After a few seconds, your connection to the Internet site should be established. The WS_FTP window will display the folders located on your local machine in the Left pane of the window and folders located on the host Web server in the right pane of the WS_FTP window.
To locate the pages you created, navigate to C: /LEGACY\WEB\ in the left window. The project name you previously entered will be in the folder. The files with a.htm extension are web pages. The extensions for pictures are either.gif or.jpg.
- Select WS FTP to require lowercase file names by clicking the Options button. (See Filenames: Forcing Lower Case Filenames.)
- Select the files you wish to move to the web server (right window) from your computer (left window). In the center, click the right arrow button.
- Close the WS_FTP Pro window after the transfer is finish. Get in touch with your ISP if you’re having trouble.
Force Lowercase Filenames
- If you have any questions about whether or not your ISP has uppercase/lowercase file naming conventions.
- Be sure to uncheck the box next to “Uppercase All Filename References” when creating a new web page in web page creation options (Internet, Creating a New Web Page, Formatting tab, convert to Lowercase Letters).
- Most FTP utilities (including WS_FTP) have a setting to force lowercase filenames to be transferred at the time of transfer. In WS_FTP, go to Options, Select Sessions Options, check the Force Lowercase Filenames box, and Save Changes.
Customizing Legacy To Automatically View Your Pages:
You can configure Legacy Family Tree Software so that any web page you create can be displayed in your web browser as soon as it is created by following these steps:
- Start Legacy. Select Options from the menu bar, and then select Customize in the options menu.
- Select the Launch tab.
- In the Launch tab, the topmost line will ask you which web browser you want to use with Legacy. Click the Change button.
- In the Default Browser dialog, locate your web browsers folder and select your web browser in the leftmost frame, and click the OK button.
- Click the Save button in the rightmost frame to close the dialog.
When you’re done making websites, there will be a pop-up box asking if you’d like to see what it looks like in your web browser. If you click “yes”, you can immediately see what your website will look like out on the World Wide Web as soon as it’s uploaded.
File Transferring Protocol Utilities
The following FTP applications have available downloads from the Internet (this is not a recommendation from Millennia Corporation; it’s provided only for your convenience. If you require more information about any of them, please contact the respective companies).
- 3D-ftp (3dftp.com)
- Awesome program at a great price. This is our favorite FTP program, and we use it to keep our LegacyFamilyTree.com website updated. There is a free 30-day evaluation version to download so you can see how it works for you.
- Cute FTP site (cuteftp.com)
- Evaluation version of Windows FTP software with drag and drop, broken download resuming and other functionalities that will be disable after 30 days of your use.
- WS-FTP (ipswitch.com)
- Another commonly used FTP program for Windows. Download a Free Trial version of the producer’s FTP software.
You can find more ‘FTP Software Options’ available at www.thefreesite.com/Free_Software/FTP_freeware/.
Conclusion
The above will give you a clear view of how to publish genealogy web pages in Legacy without any difficulty. For further guidance and any assistance, contact the Legacy Family Tree Help at +1-800-697-1474 or Live Chat. Our team of highly trained experts will assist you accordingly with the most suitable solutions right away.